Create Access Point In Windows 7/8

Hello my friends... Hello my readers... See you again in this post...
This time about how to create Access Point not an AdHoc with only using Windows for PC/Netbook. This post is very old post that I'm not published since 5 years ago because that time I'm very busy to write this post. In this chance, I'll show you how this application provide a guide to make an Access Point in your PC/Netbook.
Attention, you must have a Wireless Adapter in your PC/Netbook to do this. Since this application will create a virtual WiFi miniport adapter. The first you must check the point 4 in the application, if you never set the access point before, you'll see the response like this below :
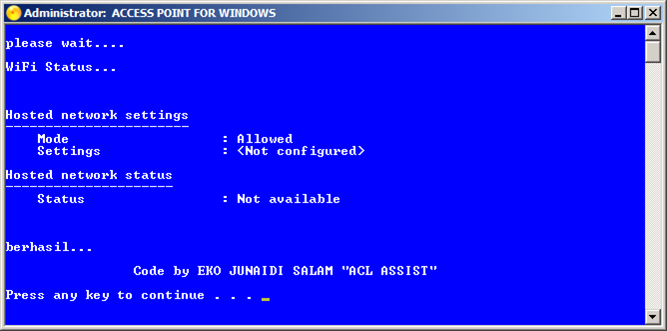
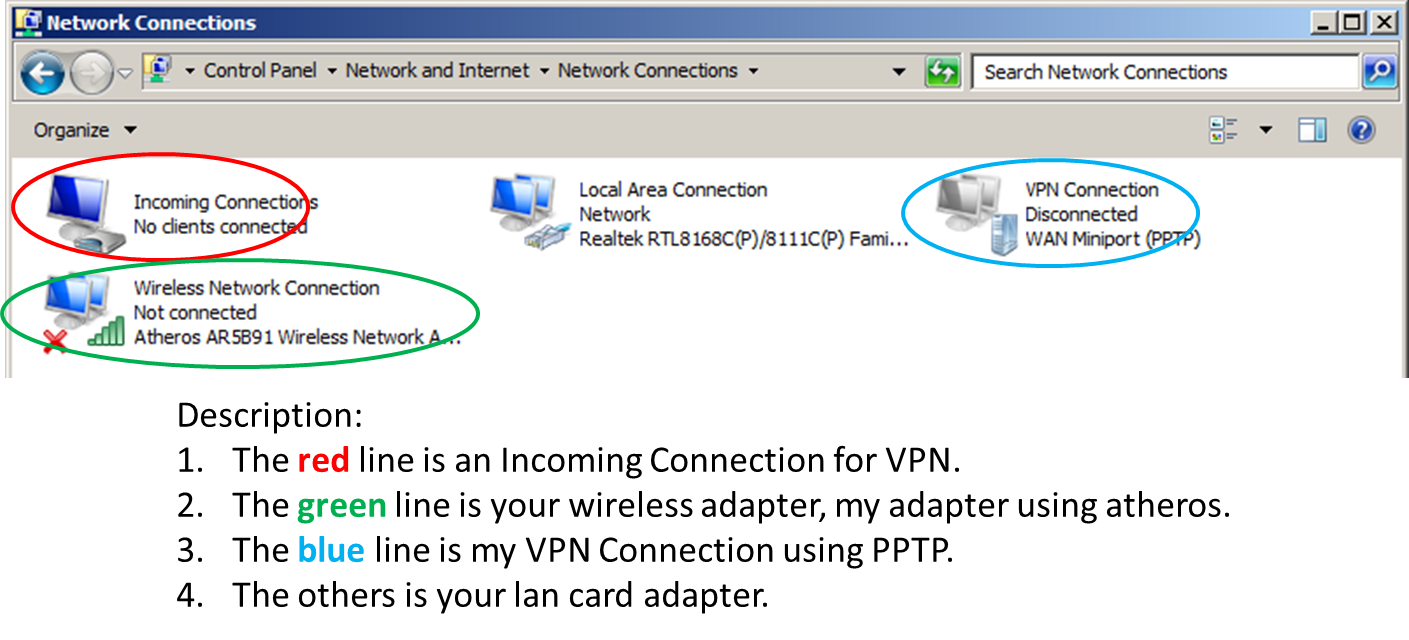
So, if your response is like above, then you never create an Access Point before. Next, let's check the adapter you have, if you have another connection like using modem, etc. You'll see much more than that, see my minimalist adapter below.
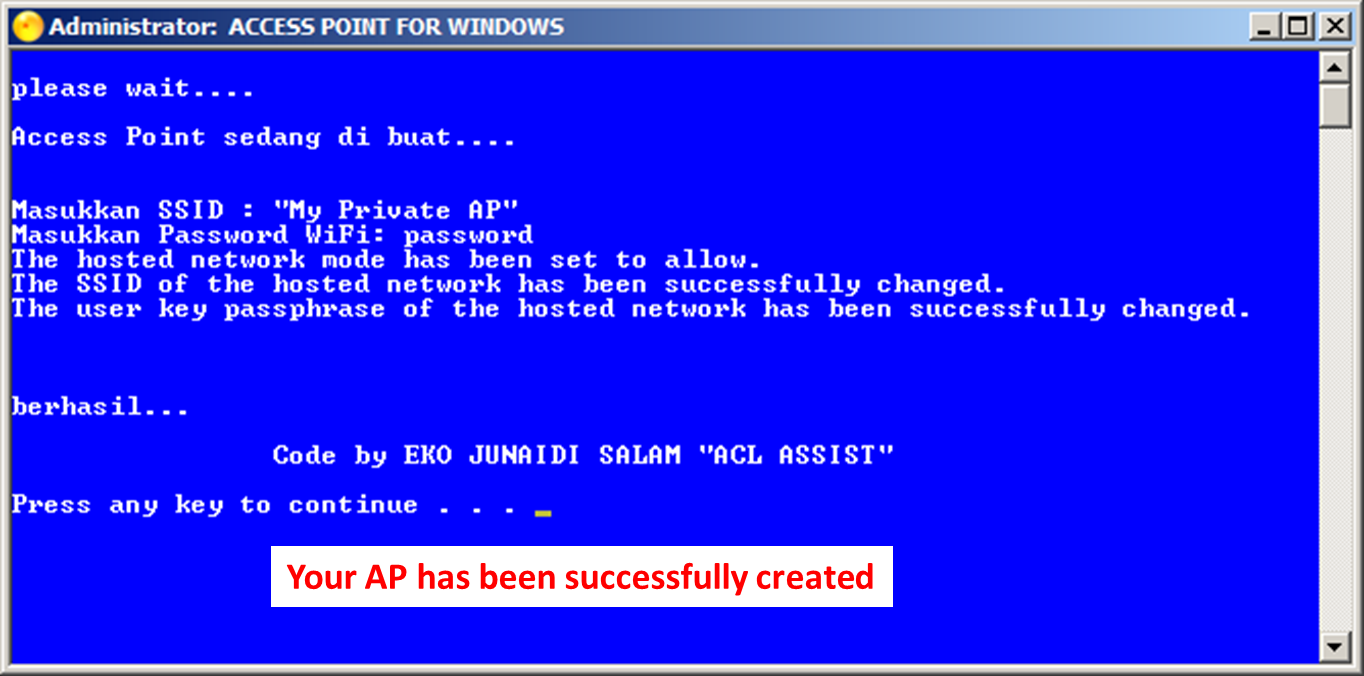
Let's continue to the point 3, we'll create an Access Point, I'll show you step by step the configuration using this application, see below :

SSID is a name for your AP, write down your SSID using double quotes, and then Enter. Next, you'll see a password for your AP, write down your password without double quotes.

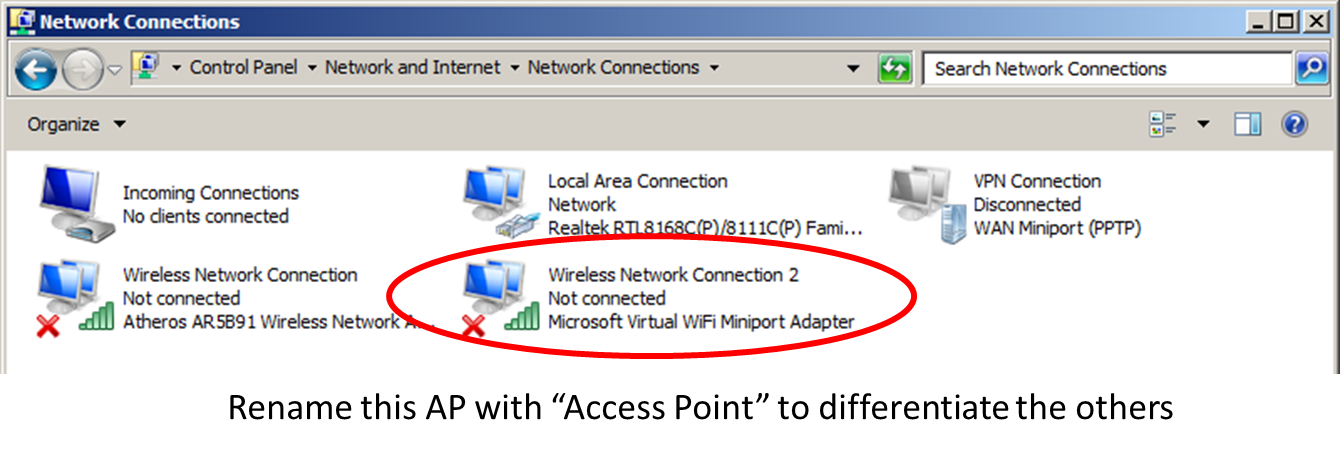
Okay, if your AP configuration has been successfully created, you'll see this response below and check for your virtual WiFi miniport adapter has been added with name "Wireless Network Connection 2". So, let's rename your AP with "Access Point".
Now, press any key to continue using the application, and then let's check out point number 4, to see the detail about your Access Point, you'll see response like below.

Everything is good until now, let's start the Access Point. That status wasn't started yet because we didn't start the Access Point. Before that, let's check your Network and Sharing Center to see the connection you have until now. My connection is like below :
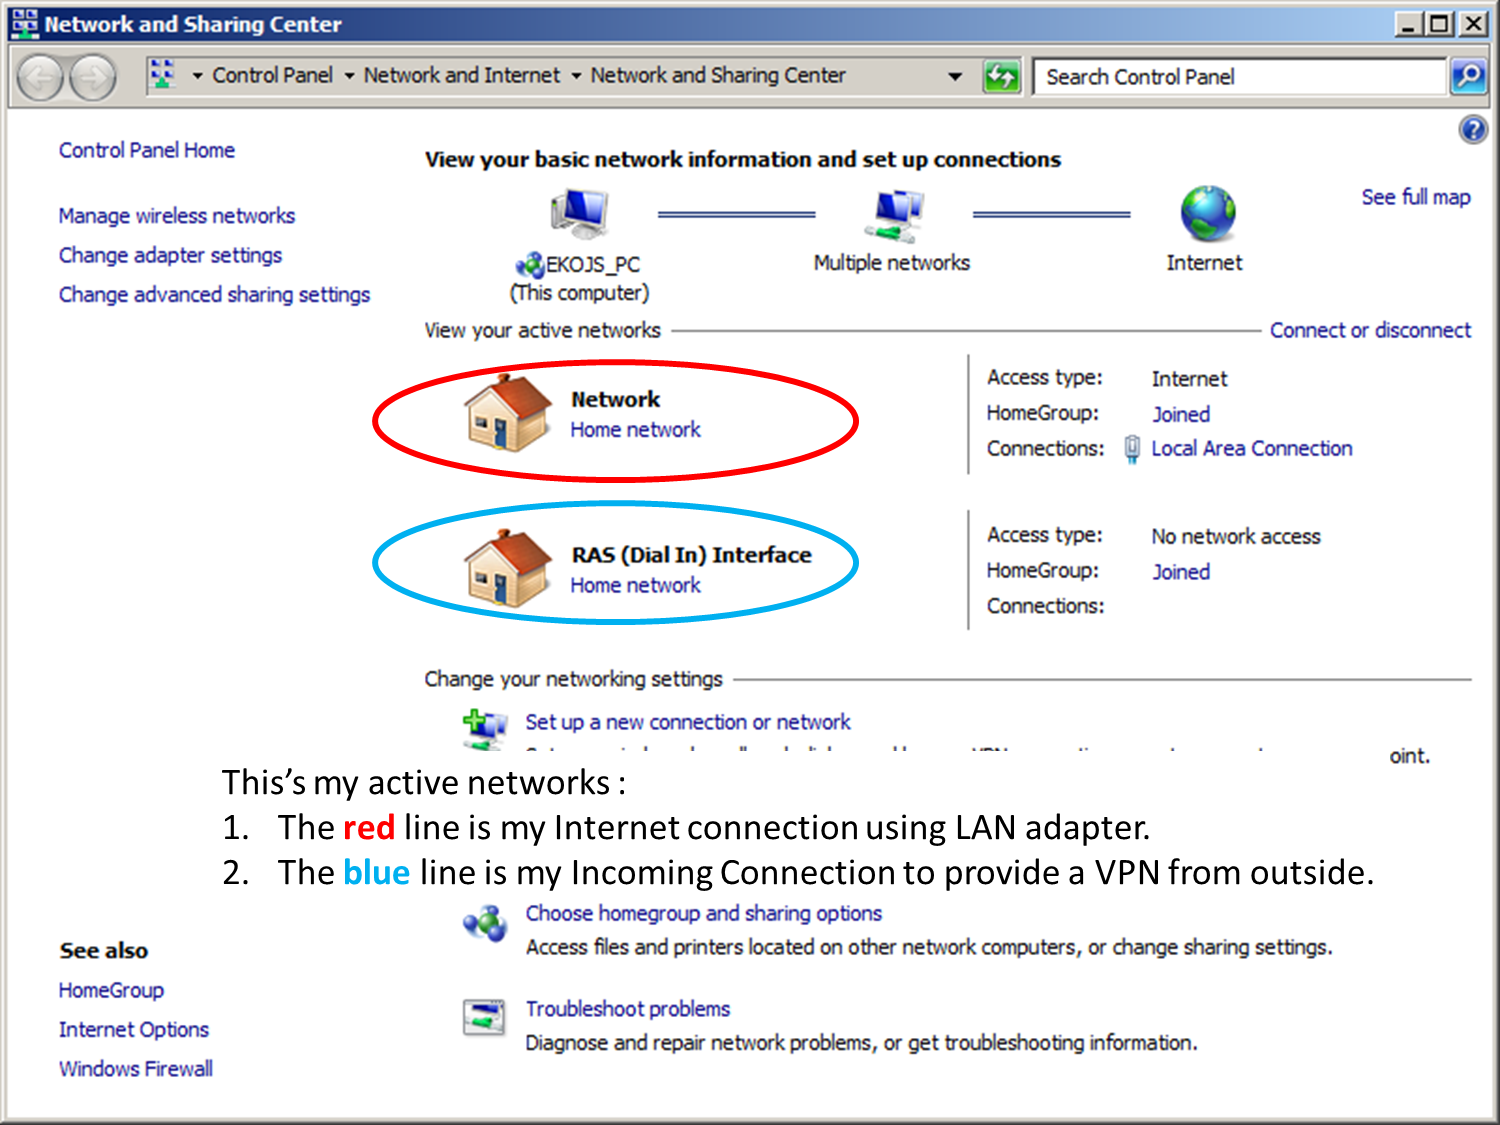
I have two active networks right now. Press any key, and then choose point number 1 "WiFi ON" to get started. If success, you'll see like below :

And then let's check out Network and Sharing Center to confirm that Access Point. You'll see like this :
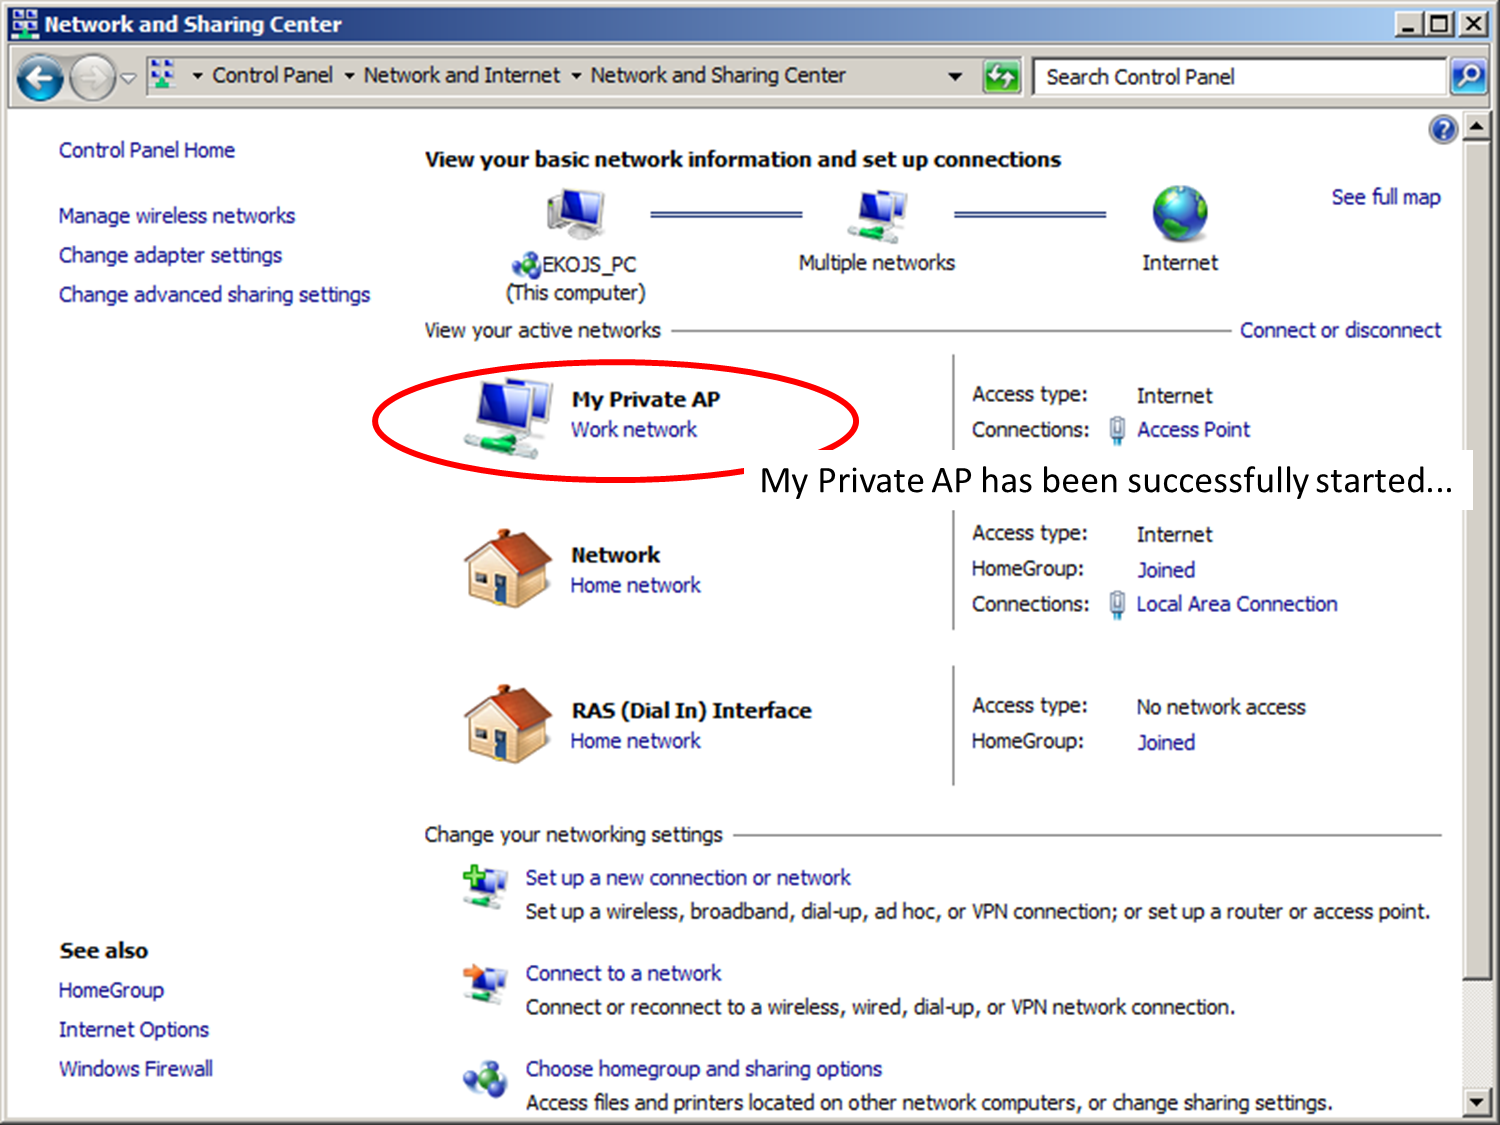
Our AP has been successfully started, if an another reason you have error message like "Not functioning" or "Error state" like error below :


So, you'll need to Disable your Wireless adapter first and take some time to Enable it again. See below to resolve your problem, if you get stuck of it just email me or comment this post, I'll replay it as soon as possible.

After you enable it again, you need to choose point number 1 again in the application. After that you can share your internet connection to this AP from your modem, etc. Or, if you just want to connect to another computer you can set the static IP to this Virtual WiFi miniport adapter and configure your another IP computer. So, that's it how to use My Access Point Application using command shell.
This application is created by using Command Shell in Windows OS and I wrapped it to an executable file.. :D
Any question about this app, please feel free to comment or send an email.
Download the application in here...
Thanks for your visitting... see you on the next post... ^^
This application is created by using Command Shell in Windows OS and I wrapped it to an executable file.. :D
Any question about this app, please feel free to comment or send an email.
Download the application in here...
Thanks for your visitting... see you on the next post... ^^